
Interior trim is the set of mouldings that finish the joints of a room: casings at doors and windows, baseboards at the floor, crown at the ceiling, and the rails, plinths, stools and aprons between them. This guide treats those elements as one system: the proportions that make them agree with the ceiling height, the materials and joinery for paint-grade and stain-grade work, what each element costs in New York City and northern New Jersey, and how trim meets cabinetry and paneling.
It is written for homeowners, architects, designers and contractors about to specify trim, from a 1920s Park Avenue co-op to a Brooklyn townhouse. The knowledge comes from our shop in Little Falls, NJ, which mills, finishes and installs trim across New Jersey, NYC, Westchester, Long Island and Fairfield County.
Key facts
- Interior trim styles fall into five families: pre-war classical, colonial revival, craftsman, mid-century flat stock, and modern shadow-gap trim with no applied profile.
- Door casings should be 3 1/2″–4 1/2″ wide under 8′–9′ ceilings and 4 1/2″–7″ wide under 10′–12′ ceilings.
- Baseboards run 5 1/4″–7 1/4″ under an 8′ ceiling, 7 1/4″–10″ under 9′–10′, and 9″–12″ built up with a cap under 11′–12′ pre-war ceilings.
- Simple crown moulding costs $80–$200 per linear foot installed and painted in NYC and NJ; a built-up crown of three or more profiles costs $200–$600.
- A full painted trim package for one 12′ × 16′ room with built-up base, simple crown and four casings runs roughly $10,000–$25,000 installed.
- Custom knives reproduce an existing pre-war profile from a few inches of intact moulding, adding about $300–$900 per profile and one to two weeks.
- Inside corners on crown and base should be coped, not mitered, because a coped joint stays closed when wood shrinks in a steam-heated winter.
- A shop-milled trim package takes 2–3 weeks for measure and drawings, 3–6 weeks for milling and priming, and 2–4 days of installation per room.
Interior trim as a system, not a catalog of parts
Interior trim is the family of mouldings that cover the joints between the planes of a room, chosen together because the eye reads them together. Trim is the most basic form of architectural millwork, and the layer that paneling, built-ins and cabinetry all have to agree with.
Three rules govern the parts: the casing is thicker than the baseboard, so the base dies into it and never runs past it; the baseboard is taller than the casing is wide, usually by 1 1/2″–3″, so the room reads as grounded; and the crown is smaller in drop than the baseboard is tall, because the weight of a room belongs at the floor.
Casing thicker than the base, base taller than the casing is wide, crown smaller than the base. If a drawing breaks one of those three, we redraw it before we price it.
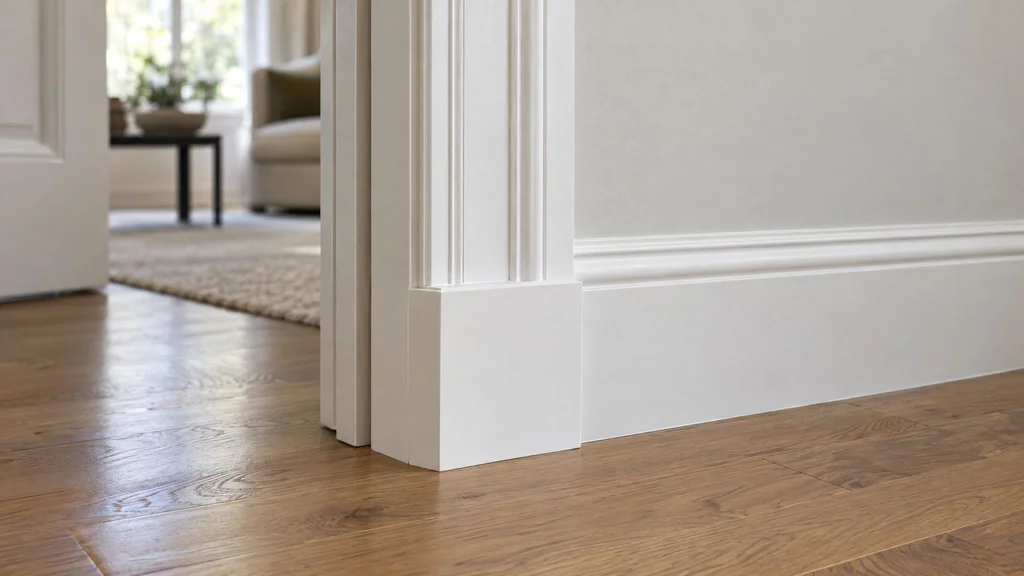
Door and window casing styles
Door casing styles divide by two decisions: the profile, and whether the head is mitered to the legs or butt-jointed over them. That combination sets the period of a room; our comparison of builder-grade and custom door casing covers why a 2 1/4″ stock colonial casing reads the way it does.
Flat and stepped casing
Flat casing is a plain board, 3 1/2″–5 1/2″ wide and 3/4″–1″ thick, and the basis of craftsman, mid-century and most contemporary trim. Stepped casing adds one or two rabbeted steps along the outer edge, each 1/4″–3/8″ deep, for a shadow line without a curve, and is our most-specified casing in transitional New Jersey houses.
Backband casing
Backband casing is a flat casing with a separate, thicker moulding wrapped around its outer edge, adding 3/8″–3/4″ so a 3/4″ casing stands proud of an 11/16″ baseboard or chair rail. It is the casing of nearly every pre-war Manhattan apartment.
Fluted casing with plinths and rosettes
Fluted casing carries three to five vertical flutes, each 3/8″–1/2″ wide, and is butt-jointed into rosette blocks at the head and plinth blocks at the floor, because flutes cannot turn a miter. It belongs to Victorian and Federal interiors and to 1980s builder houses; our guide to fluted and reeded millwork covers the texture at larger scale.
Mitered corners versus a butt head
A mitered casing turns the corner at 45 degrees so the profile runs unbroken around the opening; a butt-jointed head sits on top of the legs, 1/2″–1″ wider and 1/8″–1/4″ thicker. Miters suit colonial revival and any curved profile; butt heads suit craftsman and classical rooms and tolerate out-of-square openings far better.
Window stools and aprons
A window stool projects 3/4″–1″ past the casing face on each side, and the apron below ends in returned miters, never a raw cut. A stool over a radiator takes more abuse than any other trim, so we make it in hard maple or white oak even when the casing is poplar.
Baseboards, caps and shoe moulding
Baseboard height is set by ceiling height and casing width: 5 1/4″–7 1/4″ one-piece under an 8′ ceiling, 7 1/4″–8″ under 9′, 8″–10″ under 10′, and 9″–12″ built up with a separate cap under the 11′–12′ ceilings of a pre-war parlor floor. Shoe moulding, 1/2″ × 3/4″, closes the gap to a wood floor and is left off on tile and stone.
Base cap, 1 1/8″–1 3/4″ tall, gives a flat base a profile without milling one into a wide board that would move. The base must be thinner than the casing: a 3/4″ base meeting a 3/4″ casing leaves a flush joint that opens in the first heating season, so we hold the base at 11/16″ or add a backband.
| Ceiling height | Baseboard | Door casing width | Crown drop | Chair rail height |
|---|---|---|---|---|
| 8′ 0″ | 5 1/4″–7 1/4″ | 3 1/2″–4″ | 3 1/4″–4 1/4″ | 32″–36″ |
| 9′ 0″ | 7 1/4″–8″ | 3 1/2″–4 1/2″ | 4 1/2″–5 1/4″ | 36″–42″ |
| 10′ 0″ | 8″–10″ | 4 1/2″–5 1/2″ | 5 1/4″–7 1/4″ | 40″–48″ |
| 11′ 0″ | 9″–11″ built up | 5″–6″ | 7″–9″ built up | 44″–50″ |
| 12′ 0″ and up | 10″–12″ built up | 5 1/2″–7″ | 9″–14″ built up | 48″–54″ |
Crown moulding: size, build-up, spring angle and coped corners
Crown moulding size follows ceiling height and stays smaller than the baseboard: 3 1/4″–4 1/4″ under 8′, 4 1/2″–5 1/4″ under 9′, 5 1/4″–7 1/4″ under 10′, and a built-up assembly of 7″–14″ under 11′–12′. Our crown profile guide covers scale room by room.
Built-up crown
A built-up crown stacks two to four profiles, typically a flat frieze of 3 1/2″–5 1/2″ on the wall, a crown of 3 5/8″–4 5/8″ above it and a small cove at the ceiling. The frieze gives the installer a plumb surface to hang the crown from when the plaster is not.
Spring angle
Spring angle is the angle at which a crown leans off the wall, almost always 38 or 45 degrees. Every piece on a job must share it or the outside miters will never close.
Coped corners
Inside corners on crown are coped: one piece runs square into the corner and the second is cut along its profile to sit over it. A coped joint stays closed as the wood moves; a mitered inside corner opens 1/16″ every winter in a steam-heated apartment. Outside corners are mitered and glued, and the same joints carry into coffered ceilings.
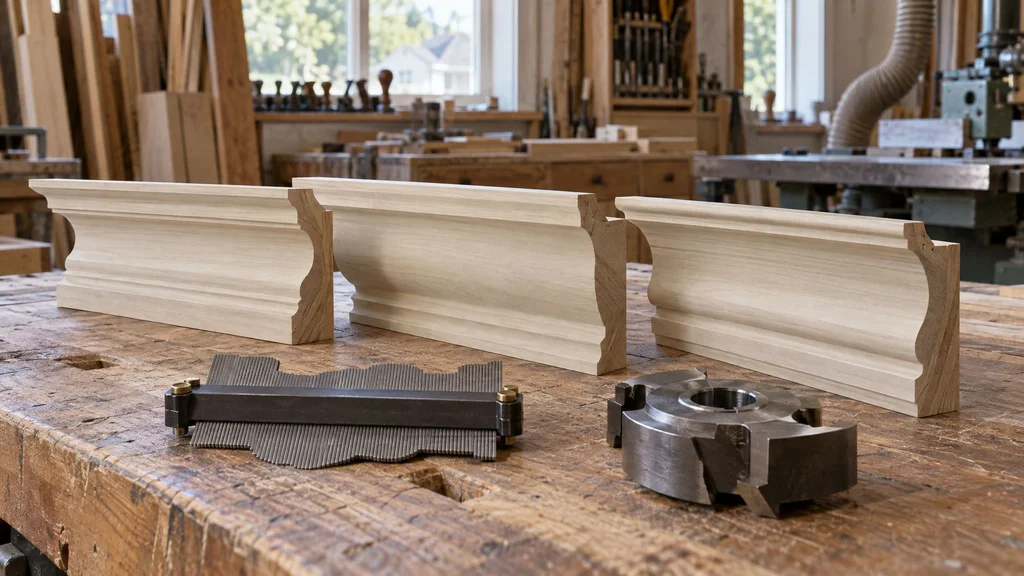
Chair rail, picture rail and plinth blocks
Chair rail height is one-third to two-fifths of the ceiling height, not a fixed 36″: 32″–36″ under 8′ and 44″–54″ under 11′–12′. The rail is 2 1/2″–3 1/2″ tall and 3/4″–1 1/8″ thick, and must be thinner than the casing it runs into. Where it caps wainscoting, our guide to wall paneling and wainscoting has the panel rules.
Picture rail is a 1 1/2″–2 1/4″ moulding with a rounded top set 12″–20″ below the ceiling, often level with the door heads in a pre-war room. Plinth blocks are 1″–1 1/2″ taller than the base, 1/4″–1/2″ wider than the casing and 1/8″–1/4″ thicker than both, so every joint lands on a flat; any base over 8″ needs them.
Trim proportions by period
Each period of house in the tri-state area has its own trim vocabulary, and mixing two is the fastest way to make a renovation look wrong. A craftsman butt-head casing under a colonial ogee crown reads as a mistake.
| Period | Casing | Base | Crown |
|---|---|---|---|
| Pre-war classical | 5″–7″ backband, mitered; picture rail | 8″–12″ built up | Built up, often plaster |
| Colonial revival | 3 1/2″–4 1/2″ ogee or stepped, mitered | 5 1/4″–8″ with cap | 3 5/8″–5 1/4″ ogee or cove |
| Craftsman | 4″–5 1/2″ flat, butt head, plinths | 6″–8″ flat with cap | Flat frieze or none |
| Mid-century | 2 1/4″–3″ flat or clamshell | 3 1/4″–4″ flat | None |
| Modern reveal | None; 1/4″–3/8″ reveal at a flush jamb | Flush, or 1/2″ shadow gap | None; shadow gap or lighting reveal |
Modern reveal-and-shadow-gap trim
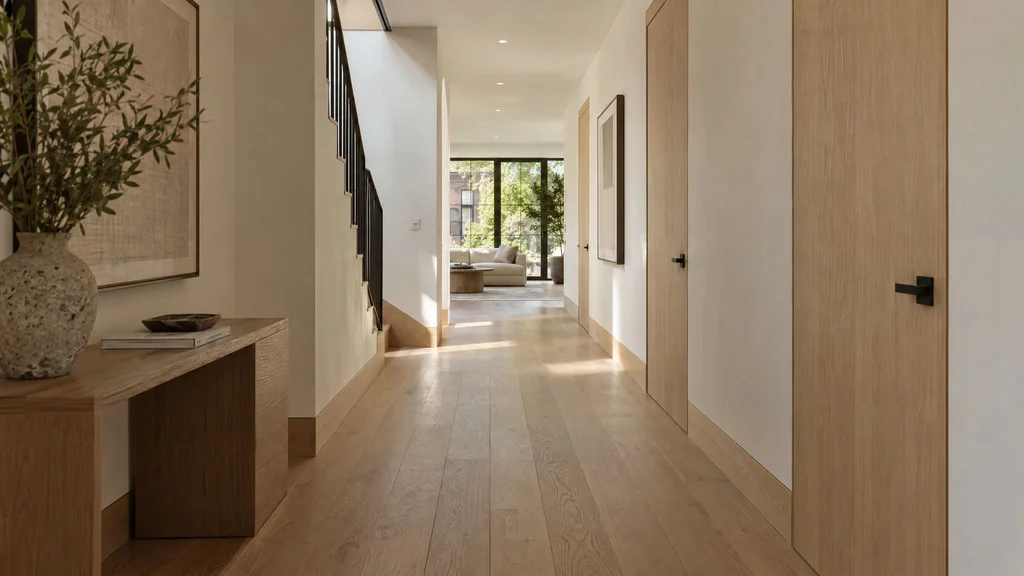
Shadow-gap trim replaces every moulding with a recess: a kerfed flush jamb that takes the skim coat, a baseboard set flush with the plaster behind a 1/4″–1/2″ gap, and a ceiling that meets the wall at a crisp corner or a lighting reveal. No profile hides a 1/8″ wave, so the plaster has to be flat within 1/16″ over 4′, and the flush base, usually rift-sawn white oak finished before installation, goes in before the skim coat.
Materials, joinery and finishes for paint-grade and stain-grade trim
Paint-grade trim is milled from poplar or MDF and stain-grade trim from solid hardwood chosen for grain and color. Paint-grade joints are glued, filled and sanded invisible; stain-grade joints have to be tight off the saw.
Poplar, MDF and finger-jointed stock
Poplar is the default paint-grade hardwood for casing, base and crown: it mills cleanly, holds a nail and copes without crumbling. MDF is stable, free of grain telegraphing and about a third cheaper, which suits flat casings, frieze boards and wide built-up base in dry rooms; its edges fuzz when coped and swell when wet, so it stays out of bathrooms, mudrooms and shoe moulding. Finger-jointed stock telegraphs its joints through paint after a few heating seasons, so it stays in closets. Curves take flexible polyurethane or laminated wood at three to five times the cost.
Hardwoods for stain-grade work
Rift-sawn white oak and American walnut make up most of our stain-grade trim. Stain-grade runs need long clear boards and color sorting so a casing does not go from pink to brown at the head miter, and cost two to three times poplar. A 7″ solid base can also shrink close to 1/8″ across its width between January and August, which is why we explain why solid wood needs room to breathe before anyone approves a wide stain-grade profile.
Custom knives for matching existing profiles
Matching an existing profile starts with a few inches of intact moulding or a profile-gauge tracing, from which we draw the section at full scale and have a knife ground for our moulder or shaper. A custom knife adds about $300–$900 per profile and one to two weeks; our post on brownstone millwork in Brooklyn follows the process from surviving sample to reproduced run.
Finishes
Painted trim leaves our shop primed and sanded and is finished on site after installation; stain-grade packages are finished in our spray booth and touched up on site. We specify a urethane-modified alkyd or acrylic enamel in satin or semi-gloss, never wall-grade latex, and Rubio Monocoat hardwax oil or conversion varnish on oak and walnut.
How trim meets cabinetry and paneling
Trim, cabinetry and paneling have to be drawn as one package, because every place they meet is a joint someone has to resolve. The casing must be at least as thick as the wainscot cap so the rail dies into it; the baseboard and the cabinet toe kick should land at the same height, or the kick should be a matching base, as our note on toe kicks, fillers and crown in custom kitchens explains; and crown on a built-in should be the room's crown or a smaller sibling, never a third moulding.
Where a built-in runs wall to wall, the room's base and crown stop at it with a return and the cabinet carries its own, scribed to the walls. Where a door sits in a paneled wall, the casing is omitted so the door reads as a panel, as in a hidden jib door, or a full stile lands beside it.
What interior trim costs in NYC and NJ
Interior trim costs $80–$200 per linear foot for simple crown and $200–$600 for a built-up crown of three or more profiles, installed and painted in New York City and northern New Jersey, with casings priced per opening. The table gives our working ranges for custom-milled, shop-primed trim installed by our crew; stain-grade hardwood runs two to three times the painted figure.
| Element | Painted, installed | What moves the price |
|---|---|---|
| One-piece baseboard, 5 1/4″–7 1/4″ | $30–$60 per LF | Shoe, floor type, plaster condition |
| Built-up base with cap and shoe, 8″–12″ | $60–$140 per LF | Number of pieces, scribing |
| Chair rail or picture rail | $35–$90 per LF | Profile, returns at casings |
| Simple crown moulding | $80–$200 per LF | Size, ceiling flatness |
| Built-up crown, 3+ profiles | $200–$600 per LF | Pieces, lighting cove, corners |
| Door casing, flat or stepped, both sides | $600–$1,500 per opening | Width, jamb extensions |
| Door casing, backband or fluted with blocks | $1,200–$3,000 per opening | Plinths, rosettes, custom knife |
| Window casing with stool and apron | $700–$1,800 per window | Return depth, hardwood stool |
As a worked example, a 12′ × 16′ living room with 10′ ceilings, two doors and two windows takes about 48 linear feet of built-up base at $2,900–$6,700, 56 linear feet of simple crown at $4,500–$11,200, two stepped door casings at $1,200–$3,000 and two window casings at $1,400–$3,600, roughly $10,000–$25,000 in all. A pre-war building adds 15–30 percent for scribing to plaster and building logistics.
Process, timeline and NYC and NJ site conditions
A shop-milled trim package takes 2–3 weeks for the field measure and shop drawings, 3–6 weeks for milling, sanding and priming, and 2–4 days of installation per room, with site painting after. Our realistic millwork timeline covers how trim fits around cabinetry in a larger job.
Field measure and sequence
Every opening is measured for width, height, jamb depth and squareness, every wall for plumb and every ceiling at the corners and center; the field measure produces a trim schedule with each profile at full scale and a count by element. On site, trim goes in after the walls are primed and the finished floor is down and protected: casings, base, crown, rails, then the painter.
Plaster walls and out-of-square openings
Pre-war plaster on lath is hollow between studs, out of plumb by 1/4″–3/4″ over a door height and rarely flat, so casings are fastened with trim-head screws and adhesive into the framing, and base is scribed or capped rather than caulked across a gap. We keep the 1/4″ reveal constant and let the miter take up the error.
Co-ops, elevators, landmarks and radiators
Co-op and condo buildings add 4–8 weeks of alteration-agreement approval, limit work to weekday hours and set the length of trim that fits the freight elevator. Landmark districts regulate exteriors, not interior trim. Steam radiators bake the base behind them, so that base is back-primed poplar, never MDF, and milled trim acclimates on site for five to seven days before installation. Our account of a pre-war co-op renovation on the Upper East Side covers the paperwork.
Planning this for a home or business in New Jersey or New York City? Get a quote for your project or call (201) 281-1457. We measure, draw, build, finish and install from our shop in Little Falls, NJ.
Mistakes we see, and the fix for each
Baseboard thicker than the casing
The base runs past the casing face and ends in a raw return. Fix: hold the base at 11/16″ against a 3/4″ casing, add a backband, or set a plinth block.
A 2 1/4″ casing under a 10′ ceiling
Stock colonial casing makes every door in a tall room look like a closet door. Fix: 4 1/2″–5 1/2″ casing with an 8″–10″ base.
Crown too big for the room
A 7″ crown with a long projection under an 8′ ceiling lowers it. Fix: 3 1/4″–4 1/4″ crown, or a flat frieze with a small cove.
Mitered inside corners
Mitered inside corners open every winter. Fix: cope every inside corner; glue every outside miter.
Caulk doing the carpenter's job
A 1/4″ bead of caulk along a casing is a wall that was never scribed to. Fix: scribe the casing or extend the jamb.
Two periods in one room
Craftsman butt-head casings under a colonial ogee crown. Fix: pick one family from the period table and stay in it.
Base installed before the floor
Base set to the subfloor loses 3/4″ of its height when the oak floor arrives. Fix: install base on the finished, protected floor.
How to brief a millwork shop on a trim package
A trim brief needs ceiling heights, a count of openings, photographs of the existing profiles, and a decision on period and finish; with those we can return a per-element price within a week. Send, or bring to the first meeting:
- Ceiling height in each room, and the length of each wall.
- A count of doors and windows per room, with rough sizes.
- Photos of the existing base, casing, crown and rails with a tape measure, plus a cut sample or profile tracing.
- Whether the finished floor is in and what it is; wood, tile or stone changes the shoe detail.
- The period or style you want, in words or three to six reference images, and painted or stain-grade.
- For NYC buildings, the alteration agreement, work hours and freight elevator dimensions.
- A budget range, so we can steer between poplar and MDF, or one-piece and built-up, before drawing the wrong thing.
You should get back a trim schedule with each profile at full scale, a count and a per-element price, then shop drawings for sign-off. Our guide to reading millwork shop drawings explains what to check; for trim, confirm the reveal, the spring angle and the base-to-casing thickness before you sign.
Frequently asked questions
What are the main interior trim styles?
Interior trim styles fall into five families: pre-war classical, with 5″–7″ backband casings and built-up base and crown; colonial revival, with ogee or stepped mitered casings and a chair rail; craftsman, with flat butt-head casings and plinth blocks; mid-century, with 2 1/4″–3″ flat casing and no crown; and modern shadow-gap trim, which replaces every moulding with a recess.
How tall should baseboards be?
Baseboards should be 5 1/4″–7 1/4″ under an 8′ ceiling, 7 1/4″–8″ under 9′, 8″–10″ under 10′, and a built-up 9″–12″ assembly with cap under 11′–12′ ceilings. The base should be taller than the casing is wide by 1 1/2″–3″ and thinner than the casing, so it dies into it cleanly.
What size crown moulding fits a 9-foot ceiling?
A 9′ ceiling takes a crown with a 4 1/2″–5 1/4″ drop, either one profile or a two-piece build-up with a flat frieze. Keep the crown smaller than the baseboard is tall, match the spring angle to any existing crown, and cope the inside corners so they stay closed through winter heating.
Is MDF or wood better for interior trim?
Poplar is better for anything that gets coped, nailed at an outside corner or sits near water: casings, base in bathrooms and mudrooms, shoe moulding and window stools. MDF is better for flat casings, frieze boards and wide built-up base in dry rooms, where it stays flat and costs about a third less.
Can you match the existing trim in a pre-war apartment?
Yes. From a few inches of intact moulding or a profile-gauge tracing we draw the section at full scale, have a custom knife ground for our moulder, and mill the new run in poplar or the original species. A custom knife adds about $300–$900 per profile and one to two weeks to the schedule.
How much does interior trim cost in NYC and NJ?
Custom-milled painted trim, installed, runs $30–$60 per linear foot for a one-piece baseboard, $60–$140 for a built-up base, $80–$200 for simple crown, $200–$600 for a built-up crown, and $600–$3,000 per door opening. A full package for one 12′ × 16′ room lands at roughly $10,000–$25,000, and pre-war buildings add 15–30 percent.
How long does a trim package take?
Allow 2–3 weeks for the field measure and shop drawings, 3–6 weeks for milling, sanding and priming, and 2–4 days of installation per room, followed by site painting. Custom knives add one to two weeks, stain-grade finishing 1–2 weeks, and a co-op alteration agreement can add 4–8 weeks before any of it starts.
If you are planning a trim package in New Jersey, New York City, Westchester, Long Island or Fairfield County, our architectural millwork service covers the measure, the knives, the milling, the finish and the installation from our Little Falls shop. Send photos of the existing trim and a ceiling height, or call (201) 281-1457, and we will tell you what the room wants and what it will cost.