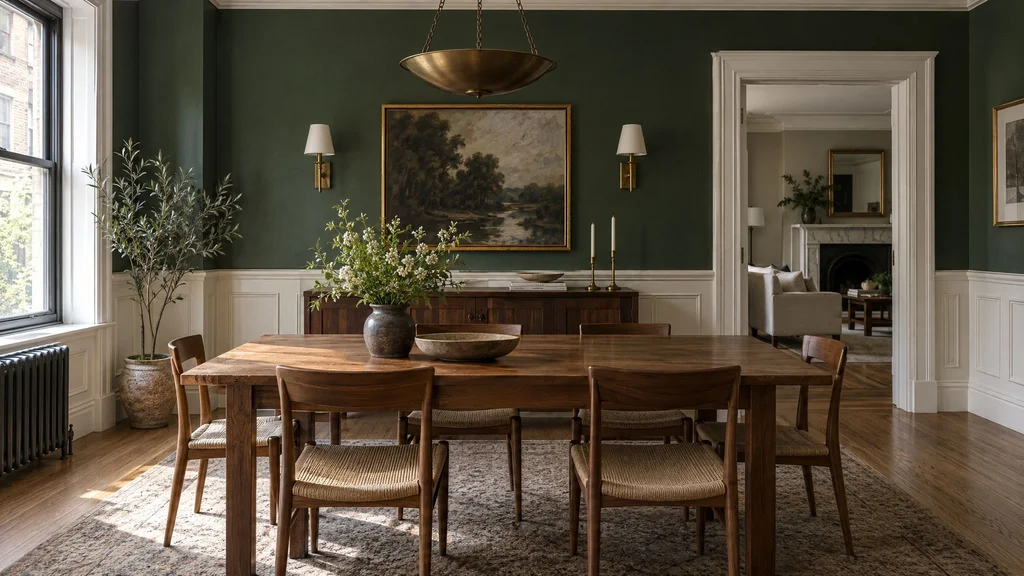
Wall paneling is the one piece of millwork that changes a room without changing its footprint. A dining room in a Montclair colonial, a hallway in a pre-war Upper East Side co-op, a private dining room in a Tribeca restaurant — each reads as finished or unfinished largely because of what happens on the walls between the baseboard and the ceiling. This guide is for homeowners, architects, designers and restaurant owners weighing a wall treatment who want to understand the options the way a shop sees them: as a set of construction decisions, not a mood board.
We build and install paneling, wainscoting, fluted walls, slat walls and coffered ceilings out of our Little Falls, NJ shop for projects across New Jersey, New York City, Westchester, Connecticut and Long Island. What follows covers the families of treatments and where each belongs, the proportion rules that separate convincing work from applied-looking work, how panels are built and finished, what they cost per linear foot in our market, how the installation fits in with other trades, and the mistakes we are asked to fix most often.
The families of wall treatments
Almost every wall treatment is a variation on three ideas: moulding applied to a flat wall, a true frame-and-panel assembly, or boards fixed side by side.
Wainscot-height treatments
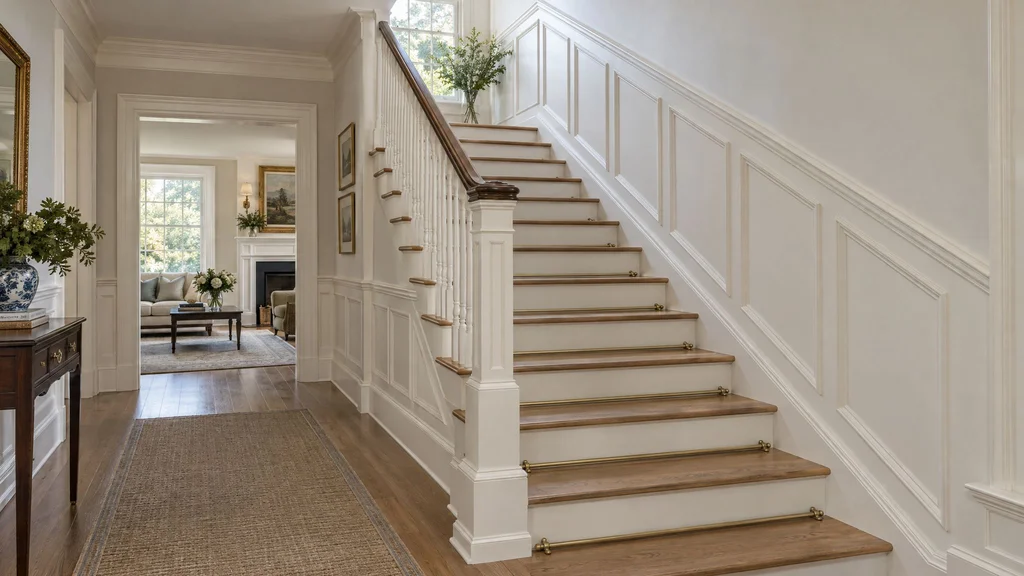
- Applied moulding (picture-frame) wainscot. Rectangles of panel moulding nailed to the wall under a chair rail. The least expensive option and the easiest to run on site. It reads well on flat drywall and poorly on wavy plaster.
- Flat (Shaker) panel wainscot. Stiles and rails around a flat recessed panel. The workhorse of modern NJ and NYC interiors because it suits transitional and contemporary rooms alike.
- Raised panel wainscot. The same frame with a beveled center panel and usually a bolection moulding. Traditional and heavier, and right in a colonial revival house where the doors are raised panel too.
- Board-and-batten and beadboard. Vertical boards or a flat field with battens; beadboard adds a milled bead. Both are casual and forgiving. Our comparison of shiplap and board-and-batten covers when each works.
Full-height treatments
- Shiplap and V-groove. Boards with a shadow line: shiplap has a rabbeted lap, V-groove a chamfered edge that reads sharper. Both belong in Hamptons and farmhouse interiors, not on a Park Avenue wall.
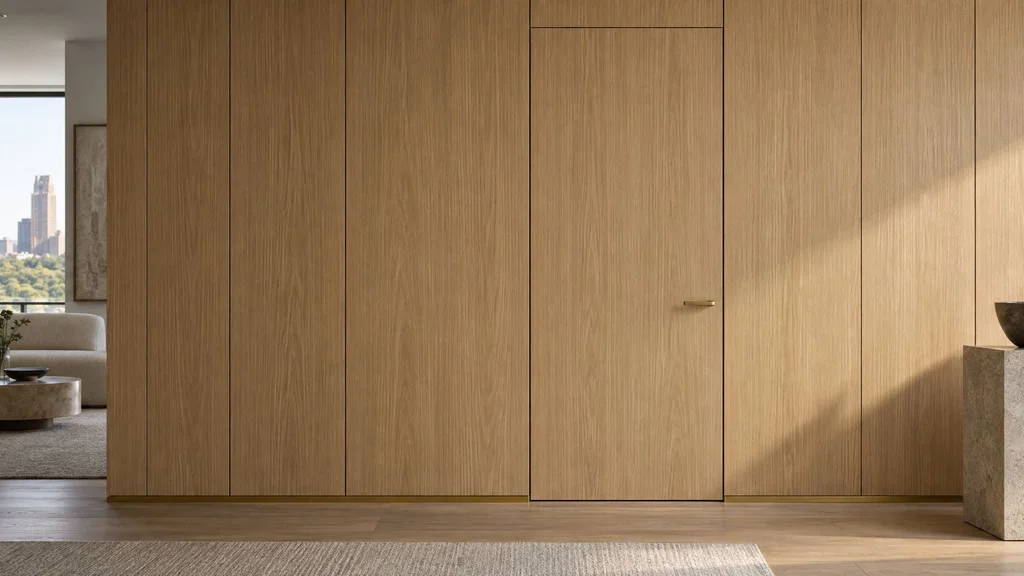
- Full-height flat panel walls. Large panels, usually 3/4″ MDF or veneered plywood, set with a consistent reveal or a slim applied moulding. The quiet backdrop for most contemporary rooms and the basis for hidden doors and concealed storage.
- Fluted and reeded panels. Vertical profiles routed into a panel or built up from strips. Fluted is concave, reeded is convex, and they catch light differently. Our fluted and reeded millwork guide covers where it works and where it does not.
- Slat and acoustic walls. Solid wood slats, typically 1/2″–3/4″ wide on similar gaps, over a black felt backer that actually absorbs sound. Popular in offices and media rooms.
- Veneer feature walls. Sequence-matched white oak or walnut veneer with the grain flowing across the whole elevation. Our post on accent walls with real depth shows the approach.
- Upholstered panels. Fabric or leather over a padded substrate in a wood frame. Quiet and soft, common behind beds and in private dining rooms.
The fifth wall
Coffered and beamed ceilings are wall paneling turned ninety degrees, built from the same frames, panels and crown returns. We cover them in a separate coffered ceiling design guide and a post on exposed versus applied beams. For a survey of every style, start with our overview of wall paneling for modern homes.
Choosing by room and architecture
Pre-war apartments versus new construction
A 1920s co-op on the Upper East Side or a Brooklyn brownstone already has a vocabulary: tall baseboards, plaster that wanders, casings with a backband, picture rails. The paneling should borrow from it rather than fight it, and it has to be built with scribe allowances because nothing in the room is square. In new construction in Jersey City or a Summit builder house, the walls are flatter but the trim is thin, so a full-height treatment needs its own base and casing to carry visual weight.
Room by room
- Dining rooms want wainscot or three-quarter-height paneling; full height can feel enclosing where people sit for two hours.
- Entries and stairs are where paneling earns its keep. The layout climbs with the stringer, so the rail is a rake, not a level line.
- Bedrooms suit full-height flat panel or upholstered walls behind the bed, often with integrated reading lights.
- Offices and media rooms take veneer or slat walls well; media rooms also need a plan for the TV, speakers and ventilation before anything is drawn.
- Restaurants need durability first: a wainscot at chair-back height takes the abuse so the plaster above does not, and fire ratings apply.
Matching existing trim
At the field measure we take a profile gauge and a photo of every existing casing, base and crown, then reproduce the profile with a custom knife or choose a stock profile that nests with it. A new chair rail dying into an older casing thinner than the rail is one of the most common failures we are asked to fix. Our wainscoting guide for modern NJ homes covers heights and styles by house type.
Proportion rules
Most paneling that looks wrong was built well and proportioned badly.
Chair rail height is not always 36 inches
The 36″ standard comes from 8′ ceilings and the height of a chair back. Under a 10′ or 12′ ceiling a 36″ wainscot looks like a stripe. We set the cap between one-third and two-fifths of the ceiling height, then adjust to clear window stools and to sit above or below the outlets as a group.
| Ceiling height | Three-quarter-height option | Typical wainscot cap |
|---|---|---|
| 8′ 0″ | 60″–66″ | 32″–36″ |
| 9′ 0″ | 66″–72″ | 36″–42″ |
| 10′ 0″ | 72″–80″ | 40″–48″ |
| 11′–12′ | 84″–96″ | 44″–54″ |
The most expensive wainscot we ever reworked was built perfectly. The stiles were square, the paint was flawless, and the cap sat at 36 inches under an 11-foot ceiling. We moved it to 46 inches and the room finally looked finished.
Laying out panels around openings
Panels should be equal in width within a wall run, and the run should start and end on a stile of the same width, not a sliver. We lay out from the centerline of each wall and absorb the odd dimension in the end stiles. The panel beside a casing should land on a full stile, and the casing should be at least as thick as the rail so the rail can die into it cleanly. Outlets move into a panel field or the baseboard rather than straddling a stile, which the electrician needs to know before the walls are closed.
Stiles, rails, base and cap
Wainscot stiles are typically 3″–4″. The bottom rail is wider than the top, often 5″–7″ over a 5″–8″ baseboard, with a 2 1/2″–3 1/2″ top rail under the cap. Full-height walls use 2″–3″ stiles, or none with a 1/4″ reveal. Radiators sit in front of the wainscot in most pre-war rooms; we stop the paneling at a removable cover or run a plain panel behind it. The cap should return to the wall or the casing, never end in the air, and crown above it should match its scale: a 3 1/2″ crown over a 54″ raised-panel wainscot looks starved. Our crown molding profile guide covers scaling crown to room height.
Construction: how paneling is actually built
Shop-built panels versus site-built moulding
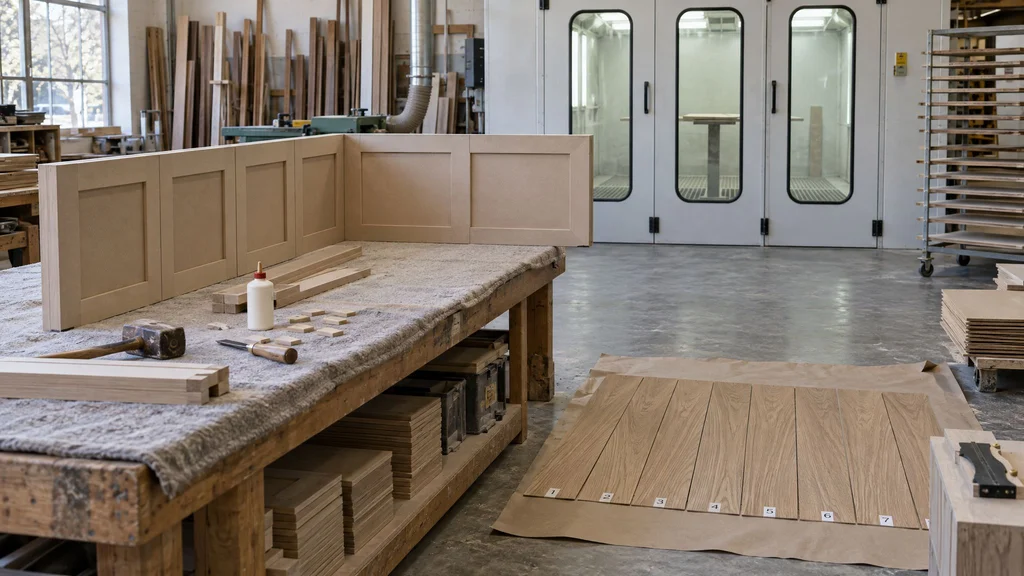
Picture-frame wainscot and simple board-and-batten are built on site from stock mouldings and primed boards. Everything else we build in the shop as panels: frames assembled, panels glued in, profiles run, sanded and finished under controlled conditions, then installed as units. Shop-built work costs more per foot but takes a third of the time on site, and keeps spraying out of your home.
Cores, thickness and joinery
Painted frames are MDF or poplar. MDF machines cleanly and does not telegraph grain through paint, so it goes into flat panels and stiles; poplar holds a nail better, so it goes into site-applied mouldings and anything that gets struck. Flat panels are 1/2″–3/4″ MDF in a 3/4″ frame; raised panels are 3/4″ MDF or solid poplar; veneer sits on a 3/4″ MDF or veneer-core plywood substrate. Frames are joined with loose tenons and glue, never pocket screws alone, so the joint survives humidity cycling without opening at the paint.
Wood movement and expansion gaps
A solid wood panel 20″ wide can move close to 1/4″ across the grain between a steam-heated January and a humid August in the tri-state area. Solid panels float in their grooves, never glued or caulked shut. MDF moves far less, which is one reason painted flat-panel work in MDF stays crisp. Long runs of slat wall or shiplap get expansion joints at inside corners. Our post on why solid wood needs room to breathe goes into the physics.
Scribing, blocking and cleats
Pre-war walls are out of plumb and out of flat. We build end panels oversize and scribe them on site, and we set a level plane of furring or 3/4″ plywood strapping behind the panels so the finished face is flat even when the plaster is not. Heavy veneer panels and anything carrying a TV hang on French cleats or Z-clips screwed into blocking installed before drywall. In commercial work, panels over fire-rated assemblies need Class A substrates, and some landlords require fire-retardant-treated cores.
Materials
Paint-grade
Paint-grade MDF is the default for anything painted, with moisture-resistant MDF in bathrooms and basements. Poplar is the paint-grade hardwood for applied mouldings and for raised panels when a client wants real wood under the paint.
Veneer
Rift-sawn white oak and walnut make up most of our veneer wall work. Grain direction is a design decision: vertical makes a room taller, horizontal makes it wider, and once chosen it should run the same way across the wall, the door in it, and the cabinetry below. We buy sequenced flitches so that panel 1 through panel 12 are consecutive leaves, laid out on the shop floor before pressing. Reconstituted veneers give a consistent straight grain at lower cost and are the right call for a very uniform look across 40 linear feet.
Solid wood and laminates
Slat walls are solid wood, usually white oak, walnut or ash, because the edges are seen and veneer edges would chip. In restaurants, offices and retail, Fenix NTM, high-pressure laminate and compact laminate earn their place on walls that get bumped, wiped and sanitized daily. A good edge detail and a thin brass or wood reveal between panels gets them most of the way to custom.
Finishes
Paneling sprayed in our booth comes out filled, sanded, primed and coated in conversion varnish or 2K polyurethane, with no brush marks and a hardness that survives chair backs and vacuum cleaners. The trade-off is that every joint and fastener at the install becomes a touch-up, which is why we design for concealed fastening and tight reveals.
Site painting is right when the wainscot is applied moulding on the existing wall, when the paneling must match a color the painter is mixing anyway, or when the whole room is being repainted. To match existing trim we pull a chip from an inconspicuous spot; if the old trim is a Benjamin Moore or Sherwin-Williams alkyd, the new work should be a comparable hardness, not a wall-grade latex. Sheen is usually satin for painted paneling and matte for wood; semi-gloss shows every wave in a pre-war wall. On veneer and solid wood we lean toward hardwax oils such as Rubio Monocoat, which can be spot repaired, and conversion varnish where a restaurant or a family with young kids needs a wipeable surface.
Integrating function
Full-height paneling is a frame that can hide almost anything, and that planning has to happen before the panel layout is drawn, not after.
- Hidden (jib) doors. A door built as a panel, hung on concealed pivot or soft-close hinges with a touch latch, so the stiles and reveals run straight across. The door must sit in a panel module, which often means the opening moves a few inches. Our hidden door guide covers hardware and tolerances.
- Concealed storage. Shallow cabinets behind panels, 4″–8″ deep, for linens and bar bottles.
- TV and speaker integration. A recessed TV bay with a removable rear panel for the mount, acoustically transparent fabric over speakers, and a ventilation path for the equipment.
- Lighting coves. A 1 1/2″ reveal at the ceiling or the top of the wainscot with an LED channel behind it. The driver needs a serviceable location.
- Acoustic backing. Felt or mineral wool behind slat walls and upholstered panels turns a loud dining room into a bearable one.
- Outlets and switches. Set into a panel field, in the baseboard, or as flush-mount plates. The worst option is a standard plate half on a stile.
What wall paneling and wainscoting cost
Pricing is per linear foot of wall, fabricated and installed, in the NYC and northern New Jersey market. Wainscoting is priced at a typical 42″–54″ height; full-height paneling assumes roughly 9′–10′ ceilings.
| Wainscoting style | Material | Price per LF installed |
|---|---|---|
| Board and batten | Painted MDF | $300–$550 |
| Beadboard | Painted MDF/pine | $350–$700 |
| Flat Shaker panel | Painted MDF | $450–$800 |
| Fluted wainscoting | Painted MDF | $600–$1,100 |
| Raised panel | Painted MDF | $650–$1,200 |
| Flat Shaker panel | White oak veneer | $800–$1,500 |
| Raised panel | Solid hardwood | $1,100–$1,800+ |
| Full-height paneling | Material | Price per LF installed |
|---|---|---|
| Board and batten | Painted MDF | $400–$650 |
| Flat Shaker panel | Painted MDF | $500–$900 |
| Fluted panel | Painted MDF | $700–$1,200 |
| Raised panel | Painted MDF | $700–$1,400 |
| Flat panel | White oak veneer | $900–$1,800 |
| Fluted panel | Walnut | $1,200–$2,200 |
| Custom profile panel | Solid hardwood | $1,500–$3,000+ |
As a worked example, a paneled room with 14 linear feet of wall and 10′ ceilings runs $8,000–$16,000 in painted flat-panel MDF, $14,000–$28,000 in rift-sawn white oak veneer, and $20,000–$35,000 in fluted walnut. Coffered ceilings are priced per square foot, $150–$600 depending on depth and profile.
What moves the price
Height is a smaller driver than people expect: a 48″ wainscot usually lands at 80–90 percent of the same style run to the ceiling, because cap, base, layout and installation labor are the same regardless of height. Profile complexity is bigger; a bolection moulding adds a machine setup and a hand-fitted miter at every corner. Veneer roughly doubles painted MDF once sequence matching is involved. Scribing to pre-war plaster, radiators, and stairs each add labor a flat new-construction wall does not. Our wainscoting cost guide and wall paneling cost guide break each line out, and our post on millwork costs in a pre-war apartment explains the building premiums: alteration agreements, insurance riders, elevator bookings and union requirements.
Timeline and installation sequence
From approved shop drawings, shop-built paneling takes 6–10 weeks to fabricate and finish; a single wall of painted flat panel is at the short end, a veneered room with a coffered ceiling at the long end. Site-built applied wainscot can start as soon as the painter has primed. Installing a wainscoted dining room takes one to two days; a fully paneled room with integrated doors and lighting takes three to five. The sequence matters more than the speed:
- Framing and blocking. Plywood strapping or blocking for cleats goes in before drywall or plaster.
- Rough electrical. Boxes set to the approved panel layout, with low-voltage runs for LED coves and TV bays.
- Drywall or plaster, then prime. Walls primed before paneling so the panel edges seal against a finished surface.
- Finished floors. We prefer to install on the finished floor, protected, so the base sits on it rather than being built up to a floor that arrives later.
- Paneling install. Panels, cap, base and crown.
- Painter touch-up or final coat. For shop-finished work this is fastener holes and joints only.
- Electrical trim-out. Plates, LED channels and switches go in last.
Mistakes we see, and the fix for each
- A 36″ chair rail under a 10′ ceiling. It cuts the room into a stripe. Fix: set the cap at one-third to two-fifths of ceiling height and check it against the window stools.
- Chair rail thicker than the door casing. The rail runs past the casing or dies into it with an awkward return. Fix: build out the casing with a backband, or choose a thinner rail.
- Panels of unequal width on the same wall. The eye finds it immediately. Fix: lay out from the centerline and absorb the odd inch in the end stiles.
- Outlets straddling a stile. Fix: move the boxes before the walls are closed; relocating afterward costs more than the paneling in that bay.
- Solid panels caulked and painted shut. They crack at the first heating season. Fix: let solid panels float, and finish them before assembly so the exposed edge is already colored.
- Fastening through the face of veneer. Every plug shows. Fix: cleats, Z-clips and concealed fasteners in the reveals.
- Semi-gloss on a wavy pre-war wall. The sheen reveals every bulge. Fix: satin or matte, and strapping to flatten the substrate first.
- Shiplap in a formal pre-war room. Fix: match the building. A flat or raised panel with a proper base is almost always the right call there.
How to brief a millwork shop
The more we know at the first meeting, the closer the first number is to the last one. Bring, or send ahead:
- Photos of every wall to be paneled, shot from across the room, plus close-ups of the existing baseboard, casing and crown with a tape measure in the frame.
- Ceiling height at two or three points and the length of each wall.
- Window, door and radiator positions, and anything else on the wall: thermostats, returns, electrical panels.
- Three to six inspiration images, with a note on what you like in each: height, profile, color, how it meets the floor.
- Your finish intent: painted to match existing trim, a new color, or wood, and which species.
- Anything the paneling needs to hide or hold: a TV, speakers, a door, storage, lighting.
- For NYC buildings, the alteration agreement and work hours; for commercial work, the architect’s finish schedule and fire-rating requirements.
- A budget range. It lets us steer you toward flat panel in MDF rather than raised panel in oak before anyone draws the wrong thing.
We return a layout drawing and a price per wall. Once approved, we field-measure, produce shop drawings, and the fabrication clock starts.
Frequently asked questions
What is the difference between wall paneling and wainscoting?
Wainscoting is wall paneling that stops partway up the wall, usually at a chair rail between 32″ and 54″. Wall paneling is the broader term and includes full-height treatments: flat panel walls, fluted walls, slat walls, shiplap and veneer feature walls. The construction is the same family; the difference is height and how the top is finished.
How high should wainscoting be?
Set the cap at roughly one-third to two-fifths of the ceiling height, then adjust for window stools and outlets. That gives 32″–36″ for an 8′ ceiling, 36″–42″ for 9′, and 40″–48″ for 10′. Three-quarter-height paneling with a plate rail at 60″–80″ is a separate option for tall rooms.
Is MDF or wood better for painted paneling?
For painted work, MDF is better for flat panels and stiles: it machines cleanly, stays flat, and does not show grain through the paint. Poplar is better for site-applied mouldings and anything that gets nailed or struck. We combine them on most jobs, with moisture-resistant MDF in bathrooms and basements.
Can you panel over existing plaster in a pre-war apartment?
Yes, and most of our NYC work is exactly that. We strap the wall with plywood or furring set to a level plane so the panels sit flat where the plaster bows, and we scribe the end panels to the wall. Hollow plaster and lath needs blocking or toggle anchors for cleats, which we plan at the field measure.
Should paneling be sprayed in the shop or painted on site?
Shop-sprayed conversion varnish or 2K polyurethane gives a harder, smoother finish with no brush marks, and keeps spraying out of your home. Site painting makes sense for applied moulding on an existing wall, or when the whole room is being repainted. Most projects combine both: panels sprayed in the shop, fastener holes and joints touched up on site.
How long does a paneling project take?
Shop-built paneling takes about 6–10 weeks from approved shop drawings to installation, plus one to five days on site depending on the room. Allow two to three weeks before that for the field measure and drawings. Site-built applied wainscot can usually be done within a week of the walls being primed.
If you are planning paneling, wainscoting or a coffered ceiling in New Jersey, New York City, Westchester or Connecticut, our architectural millwork service covers design, fabrication, finishing and installation from our Little Falls shop. Send photos and a ceiling height, or call (201) 281-1457, and we will tell you what the room wants and what it will cost.