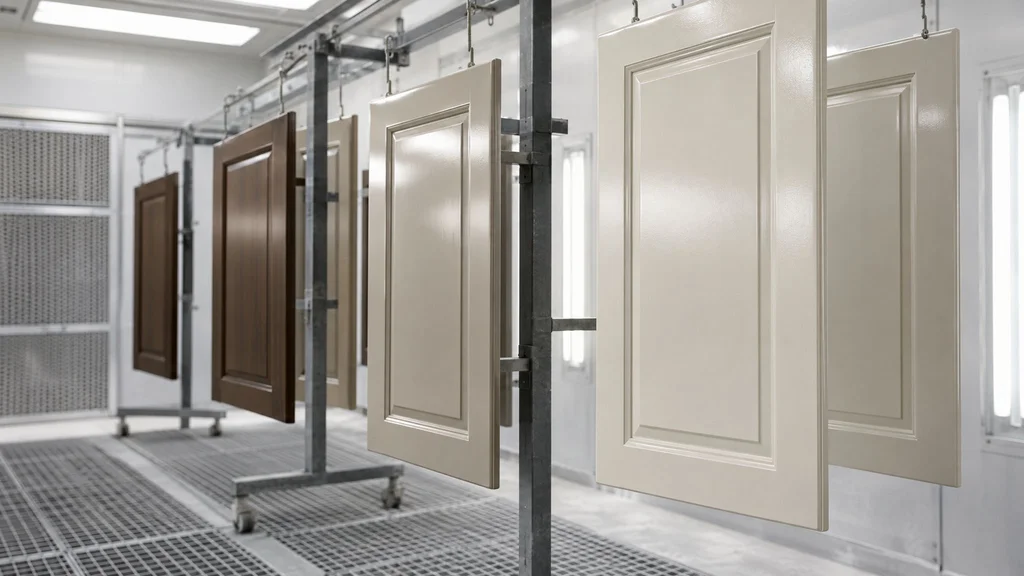
If you've ever run your hand across a truly fine piece of cabinetry, you know the finish is half the experience. It's what makes wood glow, what gives paint depth, and what protects everything from water, grease, and daily wear. It's also the step most often rushed in cabinetry — and the one where shortcuts show most clearly. Here's what goes into a professional cabinet finish, the way we do it in our shop.
Why finishing happens in a booth
Spray finishing requires a clean, controlled environment. A professional spray booth filters incoming air to keep dust off wet surfaces, exhausts overspray safely, and maintains consistent temperature and humidity so finishes flow out smoothly and cure properly. Finishes applied on site, or in an uncontrolled space, almost never achieve the same smoothness and consistency. It's one of the clearest signs of quality to ask about.
Step 1: Surface preparation
A finish amplifies whatever is underneath it, including flaws. Every surface is sanded through progressively finer grits to remove machine marks and create an even surface that accepts stain uniformly. Edges are eased slightly so finish doesn't thin out on sharp corners. Any defects are addressed now, because they'll be magnified once finish goes on.
The sanding sequence also affects color. Wood sanded to a finer grit absorbs less stain and appears lighter; coarser sanding absorbs more. That's one reason stain matching is so dependent on process — see custom wood stain matching.
Step 2: Color — stain, dye, or toner
For stained work, color can be introduced several ways. Pigmented stains sit in the pores and grain, accentuating texture. Dyes penetrate and color the wood more evenly, producing clarity and depth. Toners are tinted finishes sprayed on top to adjust color uniformly. Many refined finishes combine methods — for example, a dye for depth followed by a light toner to even out variations between boards. Specialty looks like cerused oak use additional steps to fill the grain with contrasting color.
Step 3: Sealer
A sealer coat locks in the color, provides a base for topcoats, and raises any remaining wood fibers so they can be sanded flat. After the sealer dries, the surface is scuff-sanded lightly to create a perfectly smooth base.
Step 4: Topcoats
Topcoats provide protection and determine the final sheen and feel. Most cabinet finishes receive two or more topcoats, with light sanding between them to remove dust nibs and ensure each layer bonds well. Common topcoat systems include:
- Pre-catalyzed and post-catalyzed lacquer: fast-drying, beautiful clarity, widely used in quality cabinetry. See our lacquer finish guide.
- Conversion varnish: a highly durable catalyzed finish, excellent for kitchens and heavily used surfaces.
- Hardwax oils: such as Rubio Monocoat, which bond to the wood and produce a natural, low-sheen, touchable surface that's easy to spot-repair.
- Water-based finishes: low odor and non-yellowing, good for pale woods and light painted colors.
Sheen
Sheen ranges from dead flat to high gloss. Most contemporary cabinetry uses a matte or satin sheen — roughly 10 to 30 percent — which hides fingerprints and feels refined. High-gloss finishes are dramatic but demand flawless preparation, because every imperfection shows. We cover both extremes in our guides to matte finishes and high-gloss lacquer kitchens.
Painted finishes
Painted cabinetry follows a similar sequence but with primers and pigmented topcoats. A quality painted finish typically involves a primer, sanding, multiple color coats, and a clear protective coat or a self-sealing catalyzed paint. The goal is a smooth, even, durable surface without brush marks, drips, or orange peel. Painted finishes also require attention to joint construction, because paint shows hairline movement at joints more clearly than stain. Our comparison of painted vs. stained cabinets goes deeper.
Step 5: Drying and curing
Drying and curing aren't the same thing. A finish can be dry to the touch in minutes but take days or weeks to reach full hardness. We allow proper cure time before cabinets are wrapped and delivered, because packing or installing an uncured finish can leave marks. This is one of the steps we refuse to shorten, even when schedules are tight.
Step 6: Inspection
Every finished piece is inspected under raking light — a light source held low across the surface that reveals any unevenness, dust, or dry spots. Color is checked against the approved sample. Backs of doors and interior edges are checked too, because a quality finish is consistent on the surfaces you rarely see.
Finishing the parts you don't see
Cabinet interiors, door backs, and drawer boxes should be finished and sealed. Beyond appearance, sealing all surfaces helps wood respond evenly to changes in humidity, reducing warping. Leaving interiors raw is a common cost-cutting shortcut.
Caring for your finish
Most modern cabinet finishes need nothing more than a soft cloth and mild soap and water. Avoid abrasive cleaners, ammonia, and harsh chemicals, and wipe up water promptly — particularly around sinks and dishwashers. Oil finishes can be refreshed with a maintenance product. We give every client care instructions specific to their finish.
Why the finish deserves your attention
Common finish problems — and what causes them
Orange peel (a pebbly texture) usually comes from incorrect spray settings or finish viscosity. Blotching on woods like maple or cherry comes from uneven stain absorption and is prevented with conditioners or dye-based color. Cracks at painted joints come from wood movement and are minimized through construction choices. Cloudiness can come from moisture trapped during humid conditions — another reason a controlled booth matters. A professional finisher anticipates each of these before the first coat goes on.
Finish is where the character of wood becomes visible and where durability is decided. When you're comparing shops, ask to see finished samples and completed work up close. The difference between a quick finish and a careful one is obvious the moment you touch it. It's a key part of our custom kitchens and custom furniture, and we're glad to show clients our finishing process in person at our Little Falls shop. Call (201) 281-1457 to arrange a visit.