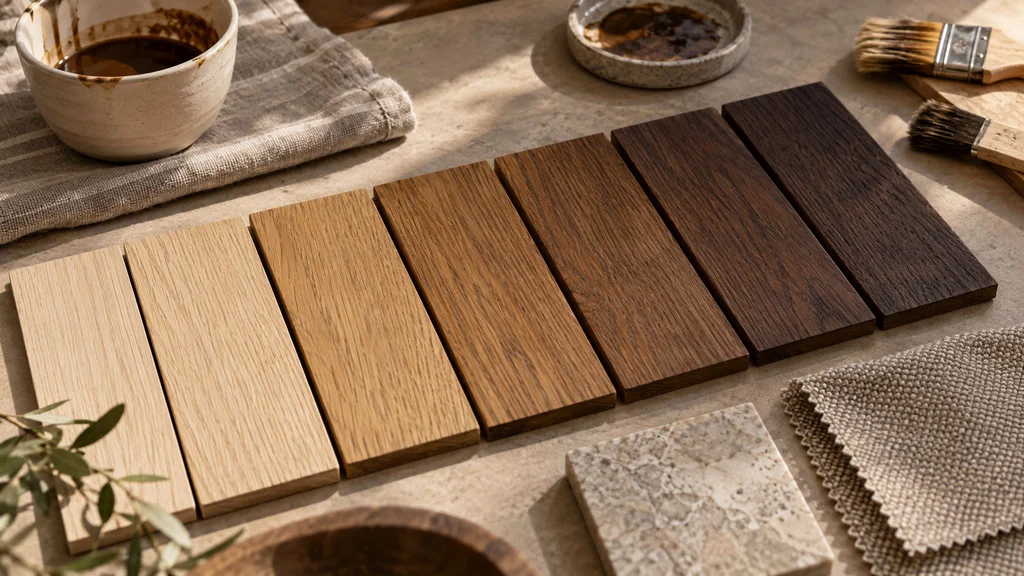
"Can you match this?" might be the question we hear most often in finish discussions. Clients bring us a paint chip, a fabric swatch, a photo from a magazine, a piece of flooring, or a door from an existing room, and want their new millwork to look exactly right with it. Custom stain matching is absolutely possible — but it's not as simple as picking a color from a can. Here's how it works, why it takes a few rounds, and how to get the result you want.
Why the same stain looks different on different wood
Stain isn't paint. It colors the wood rather than covering it, so the final result depends on the wood itself. Different species absorb stain differently: open-grained woods like oak take pigment deeply into their pores, emphasizing grain; tight-grained woods like maple and cherry can absorb stain unevenly and blotch. Natural color matters too — the same stain on pale white oak and warm walnut produces completely different colors. Even within one species, boards vary.
That's why a stain color named in a catalog, or seen on a sample of a different species, rarely matches exactly on your cabinetry. The only reliable sample is one made on your actual wood.
Why process affects color
Beyond species, the finishing process changes color: how finely the wood is sanded, whether a pre-stain conditioner is used, how long stain sits before wiping, whether the color is a pigment stain, dye, or toner, and even the topcoat, which can warm or cool the tone. We explain these variables in inside the spray booth.
How we develop a custom match
1. Start with the target
We begin with the physical item you want to match or coordinate with — ideally the actual object, not a photo, because screens and printers distort color.
2. Choose the species first
Species is decided before stain, because the wood's natural color and grain are the foundation. Sometimes the best way to achieve a target color is to change species rather than force a stain. Our wood stain color guide and walnut vs. white oak help frame the choice.
3. Mix and test
Our finishers mix and apply stain on sample boards of your chosen species, prepared exactly as your cabinetry will be. We often produce several variations — slightly warmer, cooler, lighter, darker — in the first round.
4. Review in real light
Samples are reviewed next to the target in the actual room's light whenever possible. Color shifts dramatically between daylight, warm LEDs, and cool LEDs.
5. Refine
Most matches take one to three rounds. Each round narrows in on the target.
6. Approve a master sample
The final approved sample becomes the standard for production. We keep a matching sample in the shop and check finished work against it.
Matching existing millwork and floors
Matching new cabinetry to existing woodwork or flooring is common in renovations. A few realities to keep in mind: existing wood has aged and changed color with light exposure — oak ambers and walnut lightens over time. A new piece may match perfectly at installation and diverge slightly as both age at different rates. Sometimes the better goal is coordinating rather than matching: a deliberate, complementary tone difference often looks more intentional than an almost-but-not-quite match.
Matching to fabric, stone, or paint
When matching a stain to a non-wood reference, the goal is usually harmony rather than an exact color, since wood always has grain and variation. We look at undertones — is the reference warm or cool, red or yellow? — and aim to make the wood feel like it belongs with it.
Lighting matters more than people think
The same stain can look warm under incandescent-style lighting and noticeably cooler under daylight-balanced LEDs. If lighting hasn't been selected, choose a color temperature (typically 2700K–3000K for residential warmth) before finalizing stain, and review samples under similar light.
Consistency across a large project
On a large kitchen or paneled room, consistency is as important as the match itself. We select and sort materials so color and grain are balanced across the room, mix enough stain for the whole job where possible, and check parts against the master sample throughout production. For veneered work, planning grain and color across panels matters too — see veneer matching explained.
Specialty finishes
Some looks involve more than a single stain. Cerused oak fills the grain with a contrasting color; fumed oak darkens chemically; smoked and bleached finishes alter the wood's natural color before staining. Natural oil finishes like Rubio Monocoat add color in the oil itself. Each requires its own sampling process.
Tips for getting the color right
- Bring the actual reference item, not a photo.
- Decide on species before stain.
- Review samples in the room's lighting.
- Look at samples large enough to judge — tiny chips mislead.
- Consider how the wood will age.
- Allow time for a couple of sampling rounds in your schedule.
Why it's worth the effort
How long samples take
A first round of stain samples typically takes several days to a week, since each sample needs proper preparation, staining, and at least a sealer and topcoat to show the true final color. Planning for two or three rounds before production keeps the schedule realistic and avoids rushing the decision that you'll see every day for decades.
When to stop matching and start designing
Occasionally, chasing an exact match becomes counterproductive — for example, when the reference is a heavily aged antique whose patina can't be reproduced honestly on new wood. In those cases we suggest a deliberate, complementary tone instead. The result often looks more sophisticated than a near-miss match, because it reads as a design choice rather than an attempt that fell short.
Color is the first thing anyone notices in a room, and the right tone makes millwork feel inevitable. A careful sampling process is how we make sure what arrives on site is exactly what you and your designer envisioned. It's part of every custom kitchen, closet, and architectural millwork project we build. Call (201) 281-1457 to start with samples.