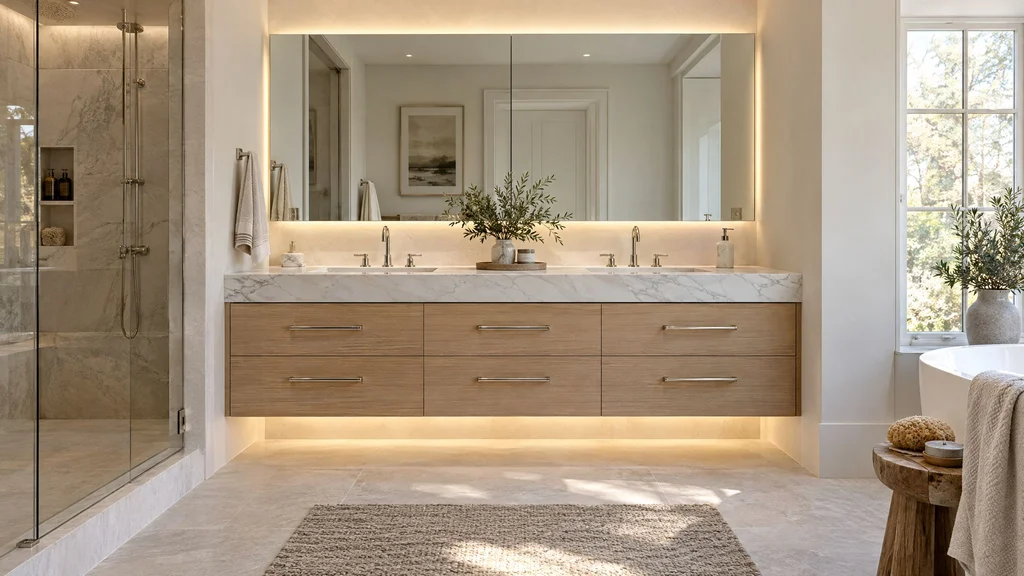
A custom bathroom vanity is the one piece of millwork in a house that gets wet every day. It has to swallow a P-trap and two supply lines, carry a slab of stone, stand up to steam, and still read as furniture. That is why we treat vanities as their own discipline in our Little Falls shop rather than as a short run of kitchen cabinets. This guide is for homeowners, architects, and designers across New York City, New Jersey, Westchester, and Connecticut who are planning one and want to know what matters before the first drawing.
It runs from the case for custom over retail through types, dimensions, plumbing, materials, tops, hardware, lighting, cost, and installation, and ends with the mistakes we are hired to fix. Where we have a deeper piece on a topic, we link to it rather than repeat it.
If your project is in a New Jersey house, our guide to custom vanities in New Jersey looks at the same subject through the lens of suburban homes in Montclair, Ridgewood, and Short Hills. This one is the broader reference, apartments included.
1. Why a custom vanity instead of a retail one
Retail vanities come in a handful of widths: 24, 30, 36, 48, 60, and 72 inches. Bathrooms do not. A pre-war alcove on the Upper West Side measures 37⅝ inches at the front and 37¼ at the back, and a 36-inch stock cabinet goes in only with fillers that announce themselves every time you walk in. A custom vanity is built to the alcove, with end panels scribed to the wall and a top templated to the actual opening.
The second reason is plumbing. In a renovated New York apartment the drain is wherever the 1950s plumber left it, and moving it means opening the floor, which in most co-ops triggers the alteration agreement. We would rather design the drawer stack around the existing trap. The third is what is inside: real drawers around the trap, an outlet in the top drawer, and a plywood box instead of particleboard, which matters the first time a supply line weeps. And we set the height for the people who use it, not for a catalog.
Retail is sometimes the right call: a rental, a basement half-bath, a 24-inch powder room where nothing needs to fit anything. We say so when it is true.
2. Types of custom vanities
Floating (wall-hung)
A floating vanity hangs with its underside 10 to 18 inches above the floor. It makes a small room feel larger, lets a heated floor run uninterrupted, and makes mopping trivial. It also needs structure: ¾-inch plywood blocking or a steel strap in the studs before the wall closes, or a steel hanging bracket after drywall. Pre-war plaster-on-masonry walls call for different anchors. Expect a 10–20% premium. Our comparison of floating versus floor-standing vanities covers the trade-offs, and the Greenwich master bath we built shows a pair in rift white oak.
Floor-standing and furniture-style
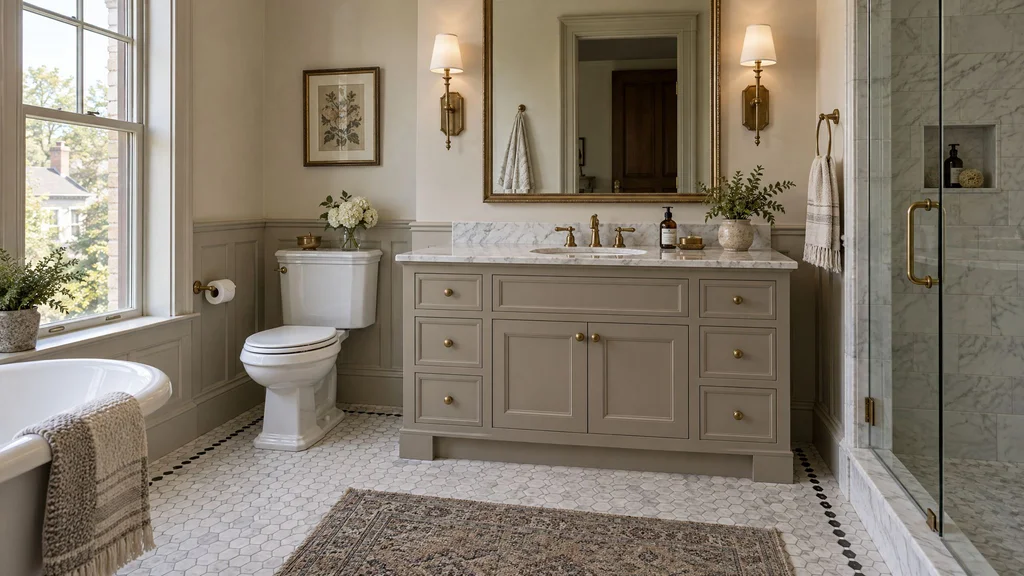
A floor-standing vanity sits on a toe kick or plinth and hides the plumbing. A furniture-style vanity on legs suits a Montclair Victorian or a Park Slope brownstone, but legs show every bit of tile lippage and collect dust. We often split the difference: a furniture profile on a recessed plinth that reads as legs from standing height.
Single and double
A single runs 24 to 60 inches. A double needs 60 as an absolute minimum and 72 to be comfortable, because two people want 18 inches of elbow room each plus a shared center drawer. In a 66-inch room, one trough sink with two faucets usually beats a cramped double. Our post on designing a double vanity that does not look like a hotel comes down to proportion and asymmetric storage.
Console and open-shelf
A console vanity is a top on an open frame. It suits a small room, but everything underneath is on display, so the trap and supplies get finished in chrome or brass and the shutoffs have to look intentional.
Powder room, kids, and master
A powder room vanity is seen by guests for ninety seconds, which is where a slab of Calacatta, a wall-mount faucet, and a 16-inch-deep cabinet make sense; see our piece on powder room vanity design. A kids’ bath wants 30–32 inches of height, a finish that shrugs off toothpaste, and drawers they can reach. A master suite is where integrated medicine cabinets, a linen tower, and a seated makeup section earn their cost.
Integrated medicine cabinets and linen towers
A linen tower in the same wood and finish, 12 to 18 inches wide and up to 84 tall, turns a vanity into a wall; an integrated medicine cabinet above the sink completes it.
3. Dimensions and ergonomics
Finished height is measured to the top of the counter. The old standard was 30–32 inches; today most adults are comfortable at 34–36, and anyone over six feet will thank you for 36. A vessel sink adds 4–6 inches, so the cabinet under it drops to 30 or 31. We ask who uses the bathroom every morning and size to them.
Depth is 21 inches as a norm, 18 where the room is tight, and 22–24 where a large undermount and a wall-mount faucet need room. Most codes want 21 inches clear in front and a sink centerline at least 15 inches from a side wall; we use 18–20 so your elbow is not on the tile. On a floating unit, 12–14 inches under the cabinet lets a mop in and still reads as floating.
The vanity, mirror, and sconces are one composition: the mirror 2–4 inches narrower than the cabinet or full width to the ceiling, sconces 60–66 inches to center and 36–40 apart on a single sink. For accessibility, the ADA figures are a 34-inch maximum rim, 27 inches of knee clearance, and shrouded pipes; a floating vanity meets them easily.
| Dimension | Typical range | What we build most |
|---|---|---|
| Finished height (to top of counter) | 30–36" | 34–36" |
| Depth | 18–24" | 21–22" |
| Single-sink width | 24–60" | 36–48" |
| Double-sink width | 60–96" | 72" |
| Sink centerline to side wall | 15" minimum | 18–20" |
| Floating vanity underside above floor | 10–18" | 12–14" |
| Sconce center height | 60–66" | 62–64" |
4. Plumbing coordination
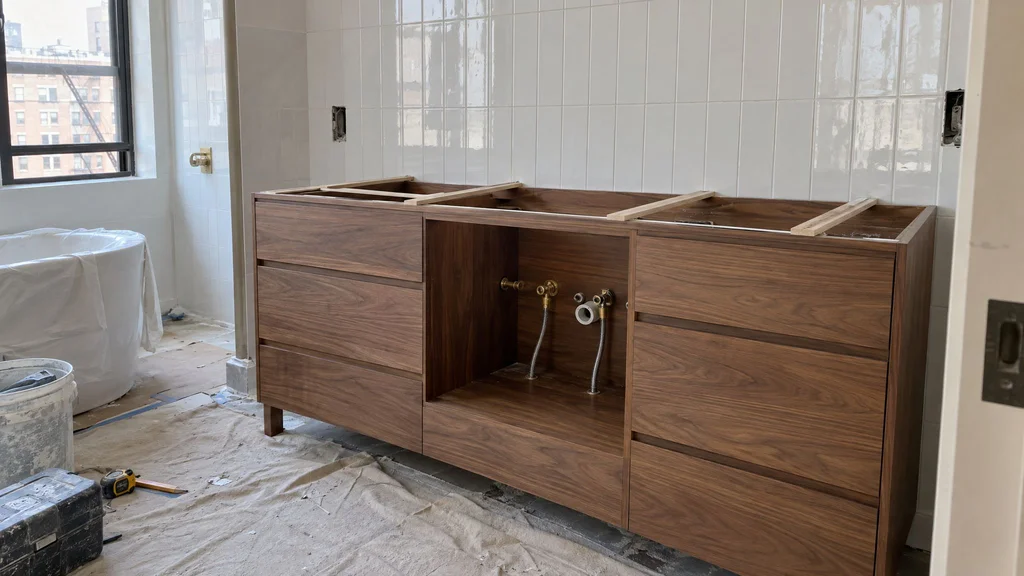
Nothing on a vanity drawing is final until we know where the drain and supplies are. We ask for rough-in photos with a tape in frame, the drain centerline from both walls, and its height above the subfloor. On new work the plumber gets our rough-in drawing, with finished top elevation and sink cutout, before a fitting is set.
We have never been called back because the wood on a vanity was too plain. We have been called back many times because the drain was in the wrong place.
Drawers around the trap
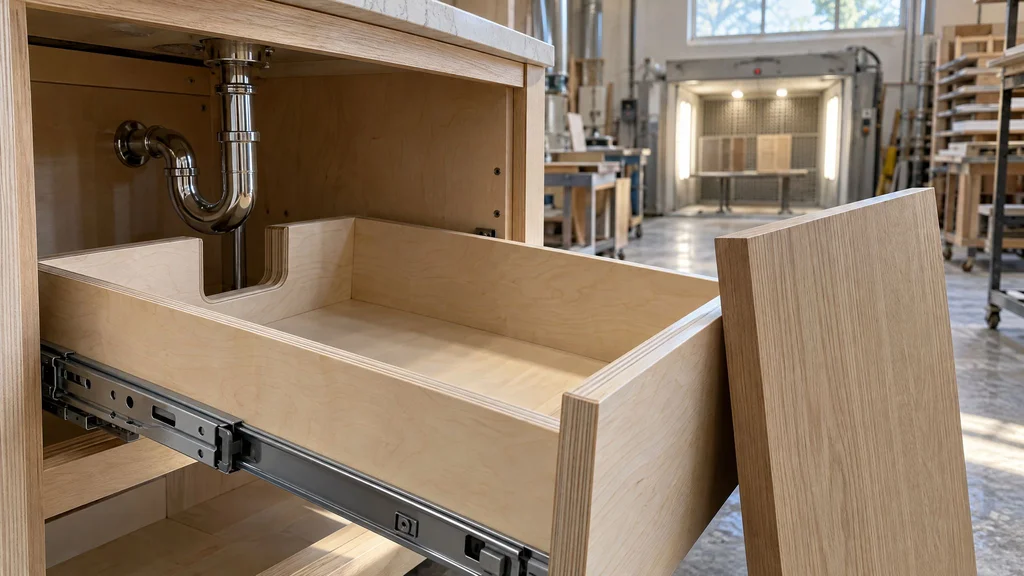
The top drawer is the one the trap fights. We build it as a U-shaped drawer, notched around the trap on a Blum Legrabox or Tandembox slide, so you still get a 4-inch-deep drawer across the full width. A wall-outlet drain, with the trap inside the wall, frees the whole cabinet but has to be planned at rough-in.
Wall-mount faucets
A wall-mount faucet puts the valve in the wall, which means blocking, a locked finished height, and a spout landing 7–9 inches above the rim and centered on the bowl. The plumber cannot set it until top thickness and sink model are final, so we ask for spec sheets before shop drawings.
Shutoffs, access, and heated floors
Angle stops go where you can reach them by pulling a drawer, not behind a fixed panel. Floating vanities get a removable back panel so the trap can be serviced in place. Heated floor mats run under a floating vanity and stop at the toe kick of a floor-standing one; the thermostat sensor stays out from under the cabinet.
Outlets inside drawers
An outlet inside the top drawer keeps a hair dryer and toothbrush charging out of sight: the electrician roughs a GFCI box into the back wall, we leave a grommeted opening in the drawer back, and the cord travels with the drawer. It has to happen before drywall, so it belongs on the first drawing.
5. Materials and finishes that survive a bathroom
A bathroom swings from 25% relative humidity under winter steam heat to 70% in August, and a steam shower pushes it toward 100% every morning. A 24-inch solid white oak door panel can move ⅛ inch across the grain between January and July, and every material decision in a vanity is about living with that.
Species we trust
Rift-sawn white oak is the default in luxury bathrooms: stable, straight-grained, good under clear and tinted finishes. Teak is the historic wet-room wood because of its oils and still the best choice for an open-shelf vanity that gets splashed, at roughly twice the cost. Walnut works well as a veneer on a stable core, though it lightens in a sunny room. We go species by species in our guide to the best wood for a bathroom vanity.
What to avoid
Solid-wood slab doors in a steam shower bathroom, whatever the species. Bamboo, which delaminates when it stays wet. Raw MDF anywhere a drip can reach, and particleboard boxes anywhere at all. We have replaced too many swollen bottom rails on five-year-old vanities.
Boxes, doors, and veneer
Our cases are ¾-inch plywood with a prefinished interior, and on a floor-standing unit the bottom and plinth are finished on all six sides so a leak sits on a sealed surface; marine-grade plywood earns its place there and nowhere else. Painted doors are moisture-resistant MDF primed on every edge, including the bottom edge nobody sees, because that is where paint fails first. Veneered doors are sequence-matched veneer on an MDF or plywood core, finished on both faces so the panel stays balanced.
Finishes
The finish is the vanity’s raincoat. Our default is 2K polyurethane, a two-component finish that cures hard, resists water and cosmetics, and tints to any Benjamin Moore or Sherwin-Williams color. Conversion varnish is a close second, slightly warmer on painted work and harder to repair. Pre-catalyzed lacquer is fine in a kitchen, but it rings where a wet glass sits. Hardwax oil such as Rubio Monocoat looks wonderful on white oak and spot-repairs easily, but a horizontal edge where water pools will mark, so we reserve it for vertical surfaces.
A 10–20 sheen hides water spots; a 30–35 satin wipes more easily. For color, bring the tile and stone to the shop: we spray drawdowns on the actual door material and judge them next to the slab, because a white that matches Calacatta in daylight can go green under a cool LED. We compare painted, stained, and natural vanity finishes elsewhere.
6. Tops and sinks
Marble is the look most clients want and the material most likely to disappoint them. It etches from toothpaste and anything acidic, and honed hides that far better than polished. Quartzite such as Taj Mahal is harder and more forgiving, though some stones sold as quartzite are dolomitic marble; ask for a scratch test on the slab. Engineered quartz does not etch, but the resin yellows in direct sun and scorches under a hot curling iron. Integrated solid surface gives a seamless bowl and top with no caulk line, hard to beat in a kids’ bath. Our vanity countertop comparison covers cost and care for each.
Edges change the proportion of the piece: a ¾-inch eased edge looks light, a mitered 1½- or 2-inch apron looks substantial. A 4-inch stone backsplash is practical; full-height tile is cleaner if it goes in before templating. Undermount sinks are our default; vessel sinks are a look, not a convenience; drop-ins collect grime at the rim.
Sequence matters: the vanity is installed and leveled, the fabricator templates, and the stone arrives 7–14 days later with faucet holes drilled to spec. Templating from a drawing instead of the installed cabinet is the most common reason a top does not fit.
7. Storage and hardware
Drawers beat doors in a bathroom every time. A three-drawer stack on each side of the sink, with a U-shaped drawer at top, holds more and keeps it visible. Inside, dividers are sized to actual objects: hair dryer and cord, makeup tray, a tall bay for bottles. Tip-out trays in the sink apron hold toothbrushes above the trap, and a pull-out hamper in the tower is the feature clients use most. More in our post on maximizing vanity storage.
Hardware is where a wet room shows its teeth. We specify Blum Legrabox or Tandembox slides with full extension and soft close, and Blum Clip top hinges with integrated dampers. For pulls, unlacquered brass patinas fast in a bathroom; water spots and fingerprints become the finish, and clients either love that or need to know before they commit. Polished nickel, PVD brass, and matte black hold their look. We usually match the faucet finish, or contrast deliberately and repeat it in the sconces. Our guide to choosing vanity hardware walks through the combinations.
8. Lighting and mirrors
A recessed medicine cabinet needs a 3½- to 4-inch cavity and an empty stud bay; in pre-war apartments with masonry walls that often does not exist, so we build a surface-mounted cabinet with a wood frame that returns to the wall. Either can take an integrated LED and an outlet for a razor. The options are in our medicine cabinet guide.
Sconces beside the mirror at eye level light the face evenly; an overhead fixture alone throws shadows under the eyes. Where the mirror is wide, sconces mounted on the mirror itself solve the spacing. Under a floating vanity, a 2700–3000K LED strip on a motion sensor makes a night light; the driver goes behind a removable panel, not in the wall. Our piece on vanity lighting compares side-mount, overhead, and backlit mirrors.
9. What a custom vanity costs
In the New York area, a custom bathroom vanity runs from around $3,500 for a well-built painted single to $25,000 and up for a long double in walnut or white oak with towers and integrated storage. The figures cover design, fabrication, finish, and installation of the cabinetry and exclude the stone top, sink, faucet, mirror, and the plumber’s and electrician’s work.
| Type | Notes | Price range |
|---|---|---|
| Single vanity, 30"–42" | Painted or veneer, standard configuration | $3,500–$7,500 |
| Single vanity, 48"–60" | Larger format, more drawers | $5,000–$10,000 |
| Double vanity, 60"–72" | Two sinks, integrated storage | $7,500–$15,000 |
| Double vanity, 84"–96"+ | Full dressing room scale | $12,000–$25,000+ |
| Floating / wall-mounted | Requires structural blocking | Add 10–20% |
What moves the number: a second sink adds a second trap, U-drawer, and set of hardware; a marble or quartzite top typically adds $2,500–$6,000 once slab minimums are counted; each integrated medicine cabinet adds $1,500–$4,000; a matching linen tower runs $3,000–$8,000; a custom color match or high-gloss finish adds 10–20% to the cabinetry. The full breakdown is in our bathroom vanity cost guide for NYC.
10. Timeline and installation sequence
From approved shop drawings, a vanity takes 6–10 weeks to build and finish. The bathroom takes longer because the vanity sits in the middle of three other trades. The sequence we insist on:
| Step | Who | When |
|---|---|---|
| Field measure and rough-in review | épure with plumber | Week 0 |
| Shop drawings and finish samples | épure | Weeks 1–3 |
| Plumbing and electrical rough-in | Plumber, electrician | Before walls close |
| Fabrication and finishing | épure | 6–10 weeks |
| Floor and wall tile complete | Tile setter | Before vanity install |
| Vanity installation | épure | 1 day |
| Stone template, then install | Stone fabricator | 7–14 days after template |
| Final plumbing, hardware, mirror | Plumber, épure | After stone |
Tile goes in before the vanity, always. On a floating unit that means full tile behind and below it; on a floor-standing unit the floor tile runs under the cabinet so a future owner can change the vanity without redoing the floor. In a Manhattan co-op, add the building to the calendar: alteration agreement approval, elevator reservations, 9-to-4 work hours, and corridor protection stretch a one-day install into a week of scheduling.
11. Mistakes we see, and the fixes
- Drain centered on the cabinet, not the sink. On an offset-sink design the trap lands mid-drawer. Fix: lock the sink location on the shop drawing before rough-in, and give the plumber that drawing.
- Faucet does not reach the bowl. A short spout on a deep undermount pours onto the back slope. Fix: check spout reach against bowl center on both spec sheets before ordering.
- Floating vanity on drywall screws. It sags, the caulk line opens, the stone cracks. Fix: blocking before drywall or a rated steel bracket after.
- Mirror and medicine cabinet ordered first. The rough opening lands over a vent stack. Fix: finalize vanity width and survey the wall, then order.
- Solid-wood doors in a steam shower bath. They cup by the second winter. Fix: veneer on a stable core, or painted MR-MDF under 2K.
- Stone templated from the drawing. The top comes up ⅜ inch short on one side. Fix: template only after the vanity is installed and shimmed level.
- Unsealed bottom edges on painted doors. Paint lifts at the floor within a year. Fix: finish all six sides and add a plinth that takes the splash.
- Door swing conflicts. A vanity door hits the toilet or the entry door. Fix: draw the swings in plan, or switch to drawers.
12. How to brief a millwork shop
The best first meetings come with a folder. What helps us most, in order:
- The plumbing rough-in: photos with a tape in frame or the plumber’s drawing, with drain centerline from each wall, drain height, supply positions, and whether anything can move.
- Fixture spec sheets for the sink (with cutout template), faucet (deck- or wall-mount, hole spacing, spout reach), and any medicine cabinet (rough opening).
- Finish references: a piece of the floor and wall tile, a stone sample or slab photo, paint chips, and a few inspiration images noting what you like in each.
- Who uses it: heights, handedness, what has to live in the drawers, and whether anyone sits to do makeup.
- Building constraints: alteration agreement, elevator dimensions, work hours, and whether the wall is framed or masonry.
- A budget range, so we design to it rather than guess at it.
With that in hand we can field-measure, draw, and give you a firm number in two to three weeks.
Frequently asked questions
How much does a custom bathroom vanity cost in NYC and NJ?
Plan on $3,500–$7,500 for a single vanity up to 42 inches, $5,000–$10,000 for a 48- to 60-inch single, $7,500–$15,000 for a 60- to 72-inch double, and $12,000–$25,000 or more at 84 inches and up. Floating units add 10–20%. Those figures cover cabinetry, finish, and installation; the stone top, sink, faucet, and plumbing are separate.
How long does a custom vanity take?
Fabrication and finishing take 6–10 weeks from approved shop drawings, with two to three weeks of measuring and drawing before that. Installation is a day. Add 7–14 days for the stone fabricator to template and install the top, then the plumber’s final hookup. Realistically, 10–14 weeks start to finish, longer in a co-op with approvals.
What is the best wood for a bathroom vanity?
Rift-sawn white oak is our first choice: stable, tight-grained, and good under clear and tinted finishes. Teak is the most water-tolerant but costs roughly twice as much. Walnut works well as a veneer on a stable core. Whatever the species, the finish does most of the protecting, which is why we use two-component polyurethane in bathrooms.
Can a floating vanity carry a stone top?
Yes, with proper support. A 72-inch floating vanity with a 2-centimeter quartzite top and two sinks can weigh over 300 pounds loaded. We specify ¾-inch plywood blocking or a steel strap across at least three studs, or a rated steel bracket when the wall is already closed; on masonry we choose anchors after inspecting the wall.
Should I choose the vanity or the tile first?
Choose them together, but install tile first. The vanity’s finish is matched to tile and stone samples in our shop before we spray. On site, floor and wall tile go in before the vanity arrives so we can scribe end panels to the tile and the floor runs continuously under a floor-standing unit.
What height should a bathroom vanity be?
Measure to the top of the counter. Most adults are comfortable at 34–36 inches; anyone over six feet prefers 36. A kids’ bath works at 30–32 inches. A vessel sink adds 4–6 inches, so the cabinet drops accordingly. ADA guidelines cap the rim at 34 inches with 27 inches of knee clearance, which a floating vanity meets easily.
Do you install vanities in Manhattan co-ops?
Yes. We work regularly in pre-war and post-war co-ops and condos across Manhattan and Brooklyn. We provide insurance certificates for the alteration agreement, schedule around elevator reservations and building work hours, protect corridors, and plan anchoring for plaster-on-masonry walls. The install is usually one day; the building’s process sets the calendar.
If you are planning a vanity anywhere in the New York metro area, our custom bathroom vanity service covers design, fabrication, finishing, and installation, and we are glad to look at your rough-in photos before you commit to anything. Call (201) 281-1457 or send us the drawings.